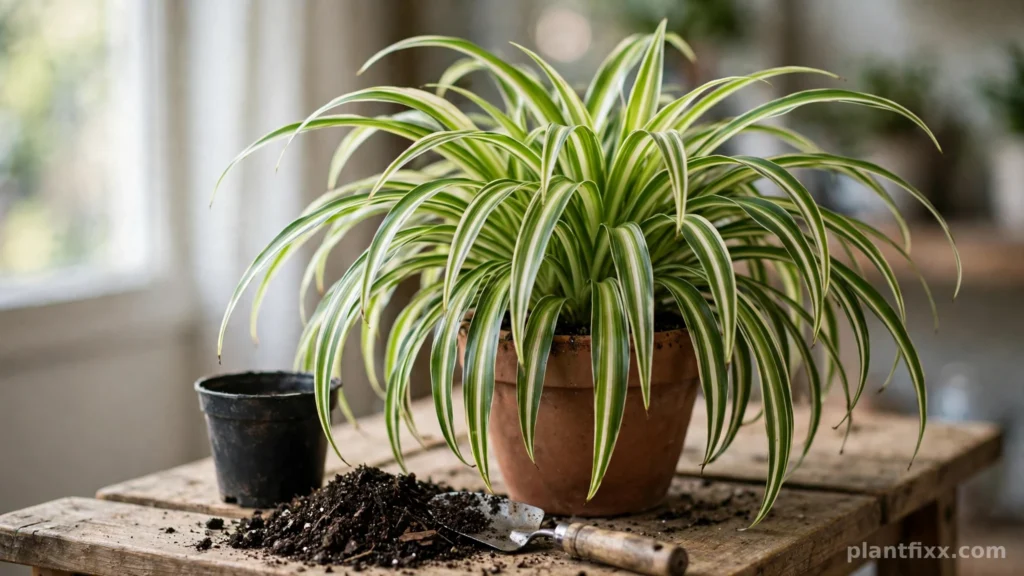
Spider plant repotting is a ten-minute job that many owners put off for a year too long. A spider plant (Chlorophytum comosum) grows fast, packs its pot with thick fleshy roots, and quietly slows down when those roots run out of room and fresh soil.
Generic repotting advice misses what makes this plant different. Spider plant roots are tuberous, so they store water and energy, and the plant actually prefers a snug pot. Move it too early, or into a pot that is far too big, and you trade a healthy plant for wet soil and stalled growth.
This guide covers the full job: the signs it is time, the right pot and soil, the transfer itself, root pruning, babies, root rot recovery, and aftercare. Work through it once and the next repot takes minutes.
Quick Answer
Repot your spider plant every 12 to 24 months in spring, into a pot 1 to 2 inches wider, with fresh well-draining mix. Water a day before, slide the root ball out, loosen circling roots, set the crown at its old depth, and water once to settle the soil.
Quick Take
Spider plants forgive handling that would set other houseplants back, because their thick roots hold water and food reserves. The real risks are a pot that is far too big, soil that stays soggy, and a crown buried too deep. Repot on evidence, not on a schedule: roots escaping, water running straight through, growth slowing. Work gently, keep the plant in indirect light for two weeks, and expect fresh growth within a month. A well-timed spring repot often triggers a new round of babies by early summer.
Why Spider Plant Repotting Matters
A spider plant grows from a cluster of thick, pale, tuberous roots. Those roots do two jobs: they anchor the plant, and they store water and starch that fuel new leaves and runners. In a pot, that storage system fills the available space fast. A young plant can pack a 4 inch pot in a single growing season.
As the roots take over, the mix around them breaks down. Old potting mix compacts, holds less air, and drains unevenly, and its nutrients are long gone, flushed out by months of watering. The plant keeps living on its reserves, but new leaves come in smaller and runners thin out.
Repotting fixes three things at once. It gives the roots room to keep expanding. It replaces tired mix with fresh, open mix that holds both air and water. And it lets you inspect the roots, which is the fastest health check this plant offers: firm and pale means all is well, dark and soft means trouble.
One mistake many people make is repotting on a fixed anniversary, whether the plant needs it or not. In practice, a spider plant that is still pushing out babies and full-size leaves is rarely desperate for a bigger pot. Mild root restriction often encourages pup production, so an unnecessary repot can cost you a season of babies. Repot when the evidence below says so, and the plant rewards you instead of sulking.
Spider Plant Repotting Signs: 7 Signals That It Is Time
Spider plant repotting signs are easy to read once you know them. One sign alone can have another cause, but two or three together mean the pot is the problem.
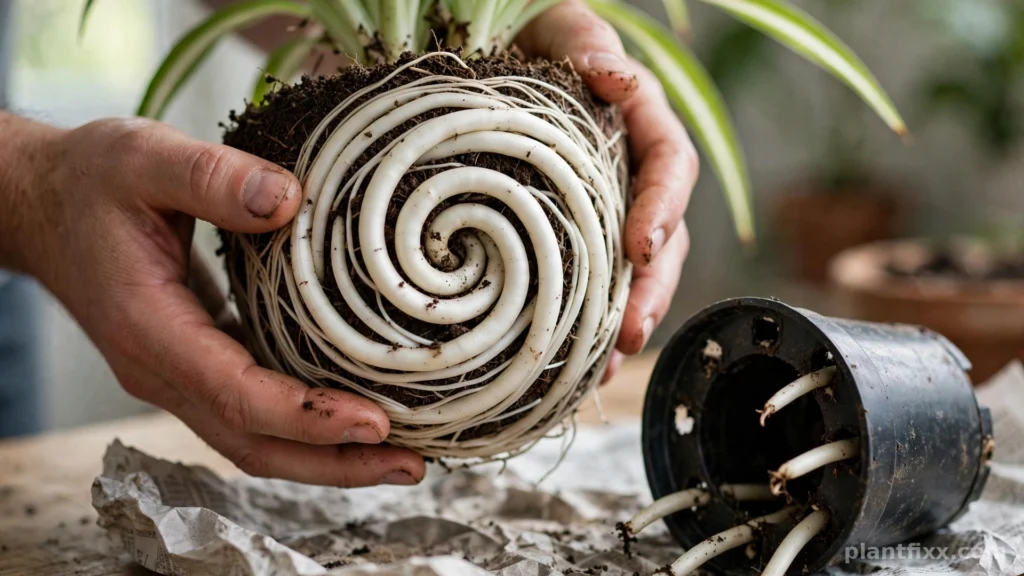
- Roots grow out of the drainage holes. White root tips poking through the bottom, or a root coil sitting in the saucer, means the root ball has reached the edge of its world.
- The plant lifts or rocks in its pot. Crowded roots push the whole plant upward, and it can sit higher than it did last season or wobble when you touch it.
- Water runs straight through. If water drains out of the holes within seconds of pouring, there is more root than soil, and the mix cannot hold moisture for the plant.
- The soil dries out within a day or two. A pot that needed water once a week and now dries out constantly is telling you the roots drink everything almost immediately.
- Growth slows and new leaves come in smaller. Check light and water first, because both stall growth too. Our guide to why a spider plant is not growing helps you rule those out.
- Baby production stops. A mature plant that flowered and made pups last year and makes none this year is often too crowded to spare the energy.
- The pot bulges, cracks, or tips over. Plastic pots bow outward under root pressure, and a top-heavy plant in a light pot falls over. Both are late signs, so act as soon as you see them.
When to Repot a Spider Plant: Timing and Frequency
The best time to repot a spider plant is spring to early summer, when lengthening days switch the plant into active growth. Roots damaged during the move regrow quickly in this window, and the plant settles into its new pot within weeks. Early autumn is an acceptable second choice in bright homes.
When to repot spider plant, in short: spring to early summer, every 12 to 24 months depending on age, or whenever two or more of the signs above show up together.
Spider plant repotting frequency depends on age. Young, fast-growing plants often need a bigger pot every 12 months. A mature plant in an 8 or 10 inch pot can go 18 to 24 months between repots. Treat those numbers as a rough rhythm, not a deadline: the signs matter more than the calendar.
Spider Plant Repotting in Winter: When It Is Still OK
Routine repotting in winter is a poor idea. Growth slows, light drops, and wet mix around inactive roots invites rot. Recovery that takes two weeks in May can take six in January.
Emergencies override the rule. Repot in winter if the pot cracks, if you find root rot, or if a new plant arrives so root bound that water will not soak in at all. Keep the job minimal: no root pruning beyond cutting away rot, the same size pot or one size up at most, your brightest spot afterward, and a light hand with the watering can until you see new growth.
What You Need Before You Start
Gather everything first, because a spider plant with its roots exposed should not wait while you hunt for scissors.
- A new pot, 1 to 2 inches wider than the current one, with drainage holes
- Fresh all-purpose potting mix
- Perlite or coarse sand for extra drainage
- Clean, sharp scissors or pruners
- A trowel or large spoon
- A watering can with room-temperature water
- Newspaper or a tray to catch old mix
- A piece of mesh or a paper coffee filter to cover the drainage holes
Water the plant a day before repotting day. Moist, not soggy, mix holds the root ball together, and hydrated roots bend instead of snapping. A bone-dry root ball crumbles and tears, and a soaked one turns the job into mud.
Choosing the Right Pot: Size, Shape and Drainage
Spider plant pot size follows one rule: go up 1 to 2 inches in diameter, no more. A pot that is too large holds a volume of wet mix the roots cannot reach, and that standing moisture is the main cause of rot after repotting. Snug is safe with this plant.
| Your plant now | Current pot | Move up to |
|---|---|---|
| Rooted baby or small starter plant | 2 to 3 inches (5 to 8 cm) | 3 to 4 inches (8 to 10 cm) |
| Young plant, first full season | 4 inches (10 cm) | 5 to 6 inches (13 to 15 cm) |
| Established plant | 6 inches (15 cm) | 7 to 8 inches (18 to 20 cm) |
| Mature, full plant | 8 inches (20 cm) | 10 inches (25 cm) |
| Large specimen | 10 inches (25 cm) | 12 inches (30 cm) |
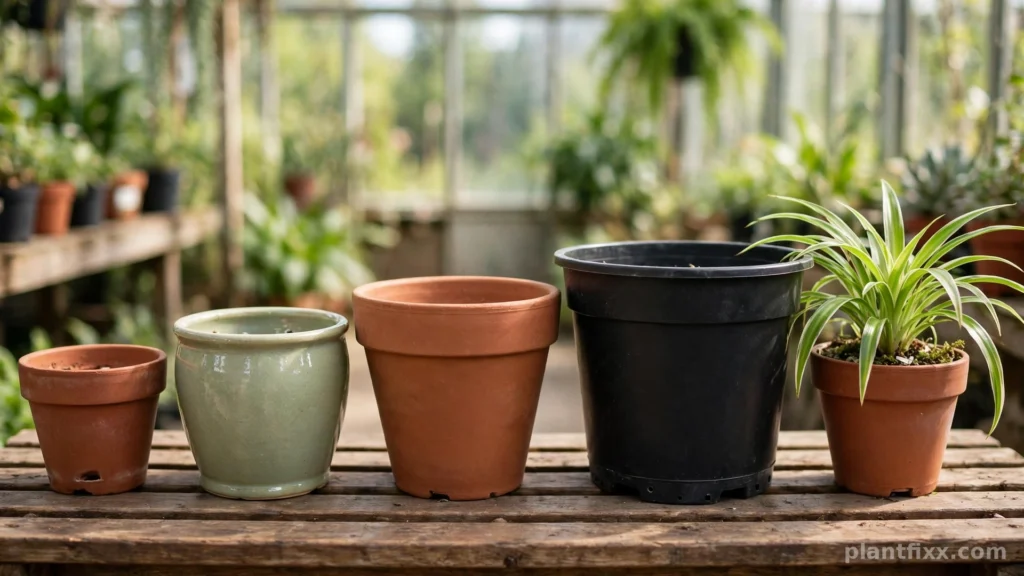
Spider plant container size is only half the choice. Shape matters too: spider plant roots spread sideways more than down, so a wide, moderately shallow pot fits the root system better than a tall, narrow one. Deep pots leave a column of unused mix at the bottom that stays wet for days.
Material changes how you water. Terracotta breathes and dries fast, which suits heavy-handed waterers. Plastic holds moisture longer and stays light, which suits hanging baskets. Glazed ceramic sits between the two. Any of them works if the size is right and the drainage is real.
Spider plant pot drainage is non-negotiable: the pot needs holes in the base. A decorative outer pot without holes is fine as a cover, as long as you empty it after watering so the plant never stands in water. Cover the holes inside with mesh or a coffee filter to keep mix in and water flowing. Skip the popular gravel layer at the bottom, because it does not improve drainage. It raises the wet zone closer to the roots instead.
Spider Plant Soil After Repotting: Refresh Rules and a Simple Mix
The soil after repotting does as much for recovery as the new pot does. For a healthy plant, shake the loose old mix off the outside of the root ball and leave the core undisturbed. A full soil replacement stresses the plant and is only worth it when the old mix is sour, pest-ridden, or rot was present.
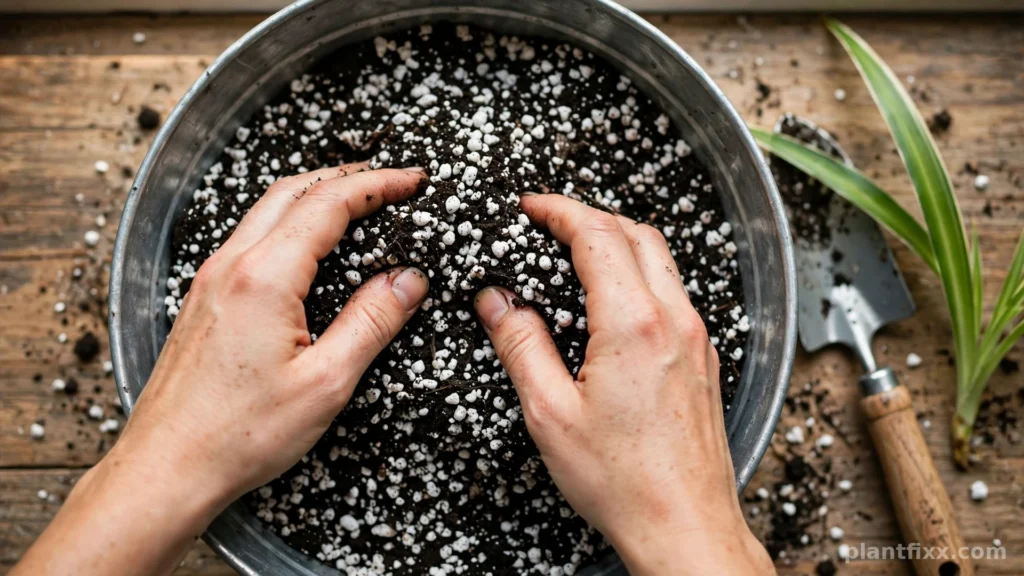
A reliable mix is two parts all-purpose potting mix to one part perlite. The perlite keeps air pockets open around the tuberous roots, and the mix drains freely while still holding moisture for a few days. Coarse sand or fine bark can replace part of the perlite if that is what you have. For the exact recipe, ratios, and pH range, see our guide to the best soil for spider plant.
Two soil rules protect the plant afterward. Never reuse old potting mix from a plant that had root rot, because the pathogens stay in it. And do not add fertilizer to the fresh mix at repotting time. Fresh mix carries enough feed for the first weeks, and fertilizer salts on freshly handled roots cause more harm than hunger does.
How to Repot a Spider Plant: Step by Step
With your materials ready and the plant watered the day before, the transfer itself takes about ten minutes.
- Step 1: Prepare the new pot. Cover the drainage holes with mesh or a coffee filter. Add fresh mix to the bottom, enough that the top of the root ball will sit about an inch below the rim once the plant is in.
- Step 2: Remove the plant. Tip the pot sideways and support the crown and leaves with one palm. Squeeze a plastic pot gently on all sides, or tap the rim of a rigid pot against a table edge, and slide the root ball out. Pull on the pot, never on the leaves.
- Step 3: Inspect the roots. Healthy spider plant roots are white to cream, thick, and firm, like short noodles. Brown or grey roots that feel soft are rot, and they need cutting away before the plant goes into fresh mix.
- Step 4: Loosen the root ball. Tease the outer roots loose with your fingers, and unwind any roots circling the bottom. Keep the core of the root ball intact. The goal is to point the outer roots outward into new mix, not to bare-root the plant.
- Step 5: Prune only if needed. If the plant is severely root bound or staying in the same pot, follow the root pruning notes in the next section. A normal move up a size needs no cutting beyond dead roots.
- Step 6: Position the plant. Set the root ball in the center of the new pot at the same depth it grew before. The crown, where the leaves meet the roots, should sit right at the soil surface. Buried crowns rot, so err on the side of slightly high rather than deep.
- Step 7: Backfill around the roots. Fill the gap between the root ball and the pot wall with fresh mix, working it down with your fingers or a spoon. Tap the pot on the table a few times to settle the mix, and press lightly. Firm contact matters, hard packing does not.
- Step 8: Water once to settle. Water slowly until it runs from the drainage holes. This closes air pockets around the roots. Empty the saucer after 15 minutes, and top up the mix if the surface sinks.
- Step 9: Rest the plant. Put the pot in bright, indirect light, away from direct sun and drafts, and leave it there for at least two weeks while new roots grow into the fresh mix.
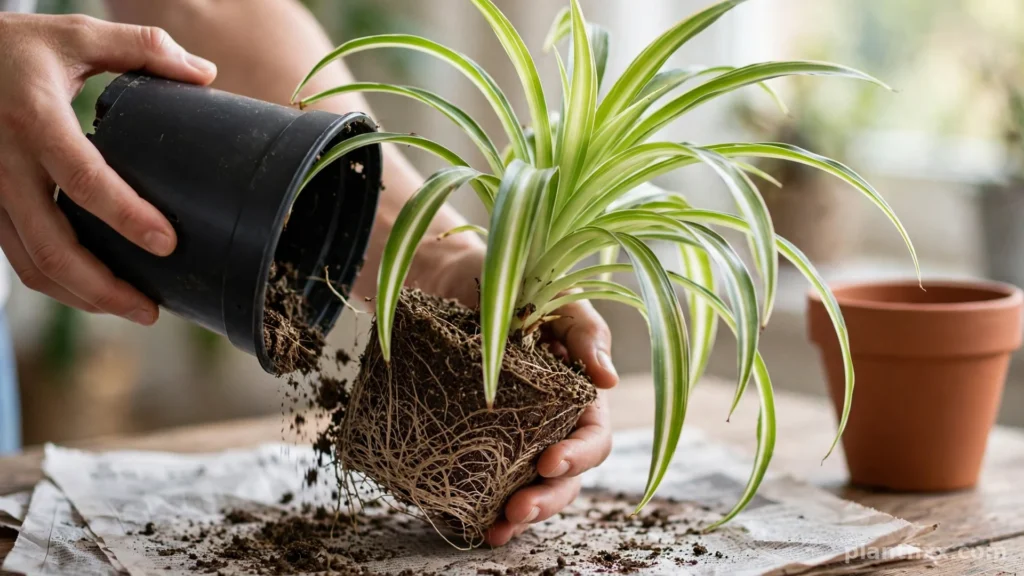
Not every crowded plant needs a bigger pot. Use this comparison to pick the right job before you start.
| Option | Best for | Root disturbance |
|---|---|---|
| Move up one pot size | A healthy, root bound plant that is still growing well | Low |
| Refresh in the same pot | A mature plant already at the biggest size you want | Medium, includes root pruning |
| Divide the plant | An overcrowded plant with several crowns, when you want more plants | Medium |
Spider Plant Root Pruning: When It Helps and How to Do It
Spider plant root pruning sounds drastic, but the tuberous roots tolerate it well because they store reserves. It helps a spider plant root bound so tightly that its roots form a solid mat with almost no soil left. It also helps a mature plant you want to keep in the same pot size for another year or two.
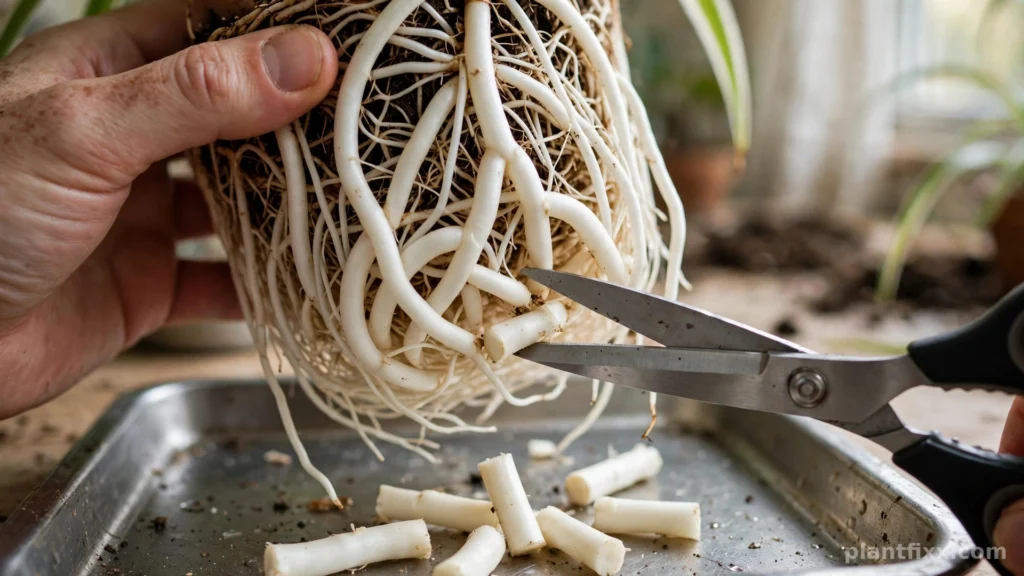
Work with clean, sharp scissors. Unwind the circling roots at the bottom and sides, then trim away up to about a quarter of the root mass, taking the oldest, darkest, and most tightly wound roots first. Always remove roots that are dead, dried out, or soft. Repot into the same pot with fresh mix packed around the trimmed root ball, and water once to settle it.
Skip root pruning on a weak or recently rescued plant, in winter, or right after a root rot recovery. Those plants need every root they have. If in doubt, move up a pot size instead, because it achieves the same breathing room with less stress.
Repotting Spider Plant Babies
Repotting spider plant babies is the easiest propagation job in houseplants, and repotting day is the natural time to do it. The babies, also called pups or plantlets, grow on the ends of long runners and often carry small root nubs of their own. Heavy pup producers vary by type, so compare spider plant varieties if babies are your main goal.
The gentlest method keeps the baby attached. Set a small 2 to 3 inch pot of moist mix beside the mother plant, rest the baby on the surface, and pin it down with a bent paperclip or hairpin so the root nubs touch the mix. Keep the mix moist. In two to four weeks the baby roots in, and you cut the runner to separate it.
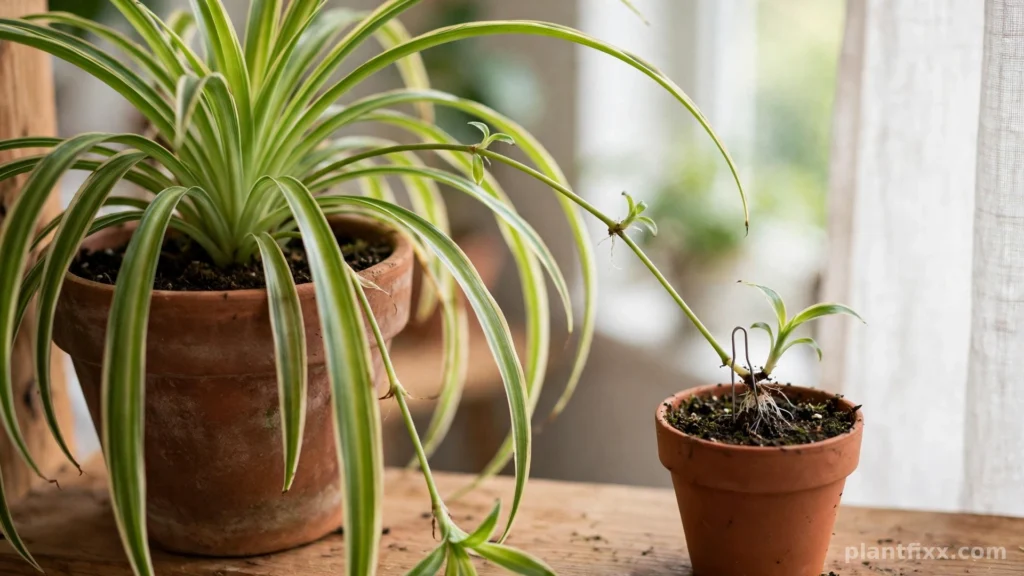
A baby that already has roots an inch or longer can skip the pinning stage. Cut it from the runner and pot it directly in its own small pot of the same mix. Babies with no roots at all root fastest by the pin-down method, or in a glass of water until roots reach an inch.
Pot babies small and keep them evenly moist for the first few weeks, because their young roots cannot yet reach far for water. Our full walkthrough of spider plant pups covers timing, separation, and first care in detail. One reassurance for pet owners: spider plants are safe for cats and dogs, so dangling babies within reach are a pruning concern, not a poisoning emergency.
Spider Plant Repotting After Root Rot
Repotting after root rot is a rescue, not a routine move, and it ignores the calendar completely. Act as soon as you confirm it: leaves yellowing while the mix stays wet, a sour smell from the pot, and roots that are brown, grey, or mushy instead of firm and pale.
Take the plant out and wash the roots under lukewarm running water until you can see every root clearly. Cut away all soft and dark tissue with clean scissors, cutting back to firm, white root each time. Remove badly damaged leaves as well, because the reduced root system cannot support them. If you reuse the old pot, wash it with soap and water and rinse it well first. Never reuse the old mix.
Repot into fresh, dry mix in a clean pot. If you cut away a large share of the roots, drop down one pot size, since a smaller root system needs less soil volume. Wait a day before the first light watering, then water sparingly until new leaves appear. The thick healthy roots that remain hold enough reserves to regrow, and most rescued plants push new growth within a month.
Aftercare and Spider Plant Repotting Shock
Some spider plant repotting shock is normal. For one to three weeks the plant may droop slightly, yellow an older leaf or two, and pause visible growth while it rebuilds roots. That pause is the plant working, not failing.
Support recovery with steady, boring care. The best light for a spider plant after repotting is bright and indirect, with no direct sun for the first two weeks. Water when the top 1 to 2 inches of mix feel dry, and settle back into your normal spider plant watering rhythm rather than watering on a fixed schedule. Hold fertilizer for at least four weeks, keep the plant away from cold drafts and heating vents, and resist moving it from spot to spot.
Signs It Is Working
New leaves emerging from the center stand firm and upright. The existing foliage perks up within the first week. By week three or four, growth resumes at the season’s normal pace, and runners lengthen again on mature plants. White root tips reaching the drainage holes a month later confirm the roots have colonized the new mix.
Signs It Failed, and What to Do
Warning signs are different in kind, not just degree: several leaves yellowing at once, stems turning soft at the base, mix that stays wet for a week, or a sour smell returning. Unpot the plant and check the roots for rot, then follow the rescue steps above. A plant that simply looks dry and limp, with mix dry all the way down, needs water, not surgery. Check the mix with a finger before you act.
Spider Plant Repotting Tips: 6 Mistakes That Set Plants Back
Most repotting problems come from a short list of avoidable errors. These spider plant repotting tips cover the ones that do real damage.
- Jumping two or more pot sizes. The extra wet mix rots roots. One size up is the rule.
- Burying the crown. Leaves that meet the roots below the soil surface rot at the base. Keep the crown at the surface.
- Skipping drainage holes. A pretty pot without holes is a bucket. Drill it, or use it as a cover pot only.
- Fertilizing on repotting day. Fresh mix has enough feed, and salts stress handled roots. Wait at least four weeks.
- Yanking the plant out by its leaves. Leaf bases tear and the crown can snap. Loosen the pot and slide the root ball.
- Reusing soil from a sick plant. Old mix from a rot case carries the problem into the new pot. Fresh mix every time.
When should you repot a spider plant?
Repot in spring or early summer when you see clear signs such as roots escaping the drainage holes, water running straight through, or growth slowing. Most spider plants need a new pot every 12 to 24 months, but the signs matter more than the calendar.
Do spider plants like being root bound?
They tolerate and even enjoy mild root restriction, which often encourages baby production. Severe binding is different: a solid mat of roots leaves no room for water or food, and growth stalls. Repot when the root ball is more root than soil.
What size pot does a spider plant need?
Move up only 1 to 2 inches in diameter. A young plant in a 4 inch pot goes to 5 or 6 inches, and a mature plant in an 8 inch pot goes to 10 inches at most. Wide, shallow pots suit the sideways-growing roots better than deep ones.
Can you repot a spider plant in winter?
Yes, but only when you must, for example after root rot or a cracked pot. Routine repots wait for spring because winter growth is slow and recovery takes longer. If you repot in winter, keep the plant in your brightest spot and water sparingly.
Should you water a spider plant right after repotting?
Yes. Water once, thoroughly, until it runs from the drainage holes, to settle soil around the roots and close air pockets. Empty the saucer, then wait until the top 1 to 2 inches of mix dry before watering again.
How do you repot spider plant babies?
Pin the baby into a small pot of moist mix while it is still attached to the runner, and cut the runner once its roots anchor, usually in 2 to 4 weeks. Babies that already have roots an inch long can be cut and potted directly.
Can repotting kill a spider plant?
Rarely, and almost never by itself. Deaths after repotting trace back to a pot that is far too big, soil that stays wet, a buried crown, or missed root rot. Correct the cause early and most plants recover, because the tuberous roots hold reserves.
Conclusion
Good spider plant repotting is mostly diagnosis. Read the signs, size the pot one step up, keep the crown at the surface, and let fresh mix and a quiet two weeks do the rest. The same skills cover the harder jobs too: pruning a matted root ball, potting up babies, and rescuing a plant from rot.
Pick a bright morning this week, check the drainage holes of your plant, and act on what you find. For the routine that keeps it thriving between repots, keep our complete spider plant care guide bookmarked.
Pingback: Spider Plant Care Guide: Full 2026 Guide
Pingback: Spider Plant in Small Pots: Care Guide (2026)