Snake plant root rot kills more Sansevieria than any other single cause. The problem is not dramatic. It does not announce itself with sudden collapse. It builds quietly underground for days or weeks while the plant looks mostly fine above the soil.
By the time you see yellow leaves, mushy stems, or a foul smell from the pot, root rot in your snake plant is already advanced. Every day you wait after that point reduces the chances of saving the plant.
This guide gives you the complete picture: what snake plant root rot looks like at every stage, what causes it, how to diagnose it correctly, and the exact step-by-step process to save a snake plant with root rot before it is too late.
What Is Snake Plant Root Rot?
Snake plant root rot is a condition where the root system begins to decay due to prolonged exposure to excess moisture and oxygen deprivation. It is caused by fungal or bacterial pathogens, most commonly Fusarium, Pythium, and Phytophthora species, that thrive in waterlogged, anaerobic soil conditions.
Here is what happens inside the pot:
When soil stays wet for too long, oxygen is displaced from the air pockets between soil particles. Snake plant roots, like all plant roots, need oxygen to function. Without it, root cells begin dying. Dead root tissue provides food for the fungi and bacteria already present in the soil. These pathogens multiply fast in wet, oxygen-depleted conditions. They spread from dying root sections to healthy ones. The decay accelerates.
Above the soil, the plant struggles to absorb water and nutrients through its compromised root system. Leaves turn yellow, soften, droop, and eventually collapse.
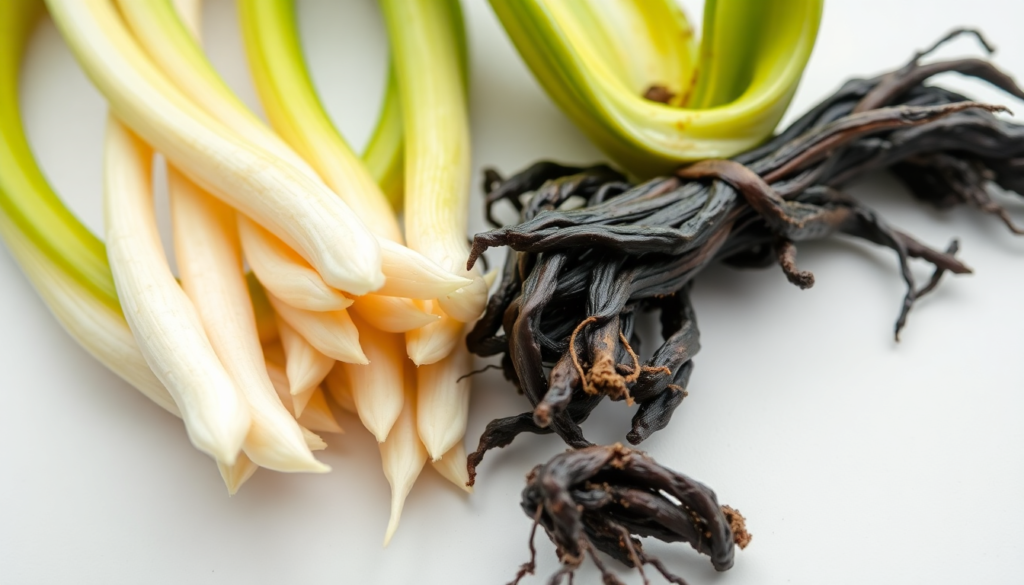
Healthy snake plant roots vs. rotten roots:
| Healthy Roots | Rotten Roots |
| Firm and solid when touched | Soft, mushy, falls apart |
| White, cream, or light tan color | Brown, dark brown, or black |
| No odor | Foul, sour, or musty smell |
| Intact structure, clean tips | Slimy texture, tips dissolve when touched |
| Absorb water and nutrients normally | Cannot absorb water or nutrients |
Snake plant root rot is irreversible in already-damaged roots. You cannot restore a rotten root. You remove it, protect the healthy roots that remain, and give the plant the conditions to grow new roots.
Stage-by-Stage Progression of Snake Plant Root Rot
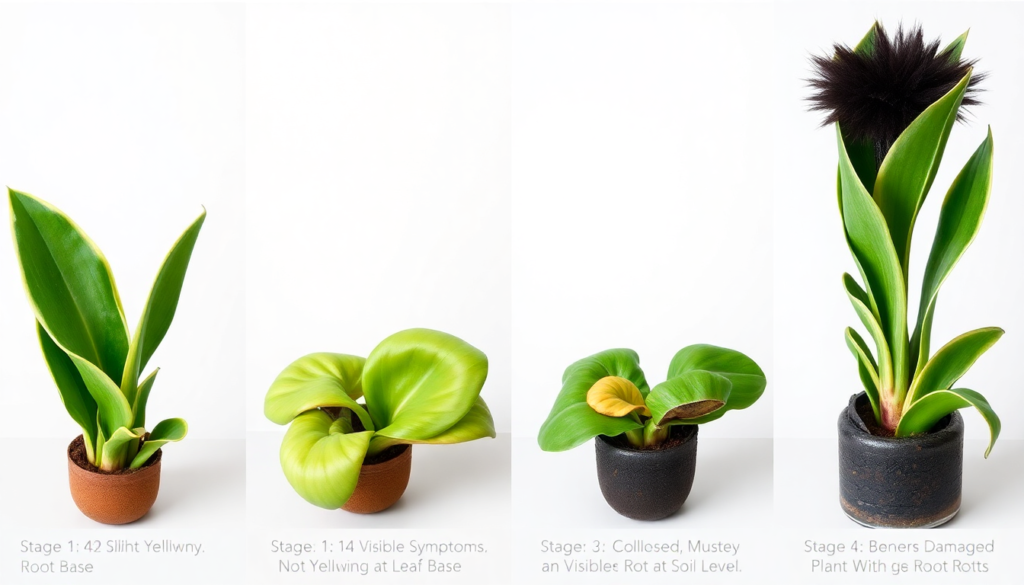
Understanding which stage your plant is at determines whether it is savable and how urgently you need to act.
Stage 1: Early rot (underground only) The roots begin to decay but no visible symptoms appear above soil. The plant looks healthy. Soil smells slightly sour if you press your nose close to the surface. This stage is difficult to catch without unpotting the plant. Most cases are never caught here.
Stage 2: First visible symptoms Yellow leaves appear, starting at the base of the plant and moving upward. Affected leaves feel slightly soft rather than firm. Soil stays wet for more than 48 hours after watering. A faint odor comes from the pot. The plant can still be saved with prompt action.
Stage 3: Active collapse Multiple leaves turn yellow and mushy. Some leaves detach easily at the base. The stem at the soil line feels soft when pressed. A strong foul odor is clearly noticeable. Roots, when inspected, show widespread brown and black decay. Recovery is still possible but requires immediate action and significant root pruning.
Stage 4: Crown rot The crown (the central growing point where leaves emerge) has turned black and mushy. This means the rot has moved from the roots into the main stem. At this stage, the plant itself cannot be saved. However, healthy leaf sections can still be propagated to start a new plant.
7 Signs of Snake Plant Root Rot
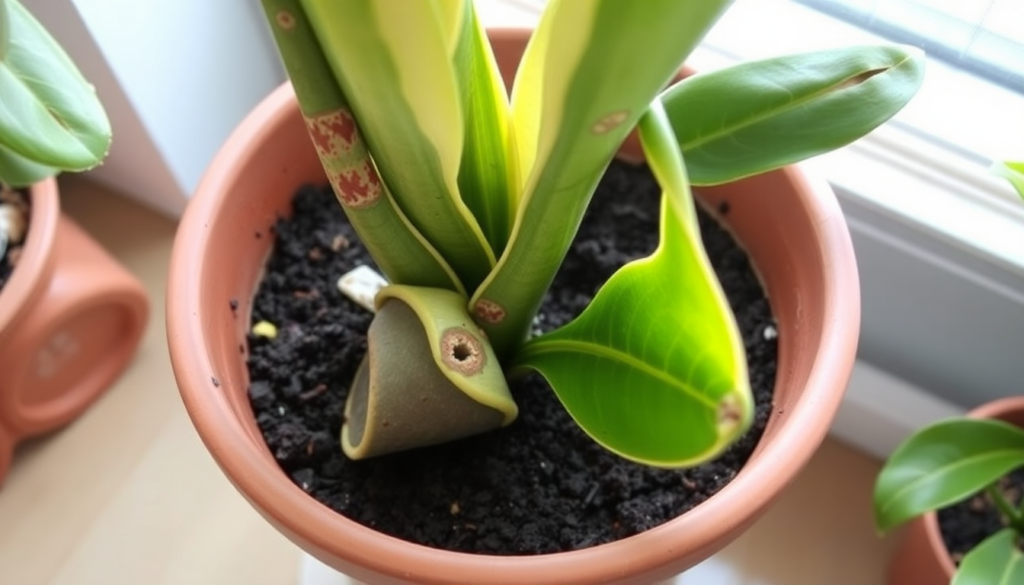
Sign 1: Yellow Leaves Starting at the Base
The first above-ground sign of snake plant root rot is yellowing that begins at the base of leaves and moves upward. This differs from sunburn yellowing (which appears on the side facing the light) and from natural aging (which affects one or two outer leaves slowly).
Root rot yellowing appears across multiple leaves simultaneously. The yellow has a soft, water-soaked quality. The affected leaves feel limp and squishy when touched.
Sign 2: Soft, Mushy Leaf Bases
Press the base of your snake plant leaves at the soil line. Healthy leaf bases feel firm and solid. Root rot makes them soft, squishy, and sometimes translucent. This is one of the most reliable early signs. You do not need to unpot the plant to check this. Just squeeze gently at the base.
Sign 3: Foul Odor From the Soil
A strong, sour, or musty smell from the soil surface or pot indicates active bacterial and fungal decay below the surface. This smell comes from the breakdown of organic matter and root tissue. If your snake plant pot smells bad, root rot is almost certainly present.
Healthy snake plant soil has a clean, earthy smell. Any deviation from this, particularly a sour, swamp-like, or rotten odor, requires immediate investigation.
Sign 4: Wilting and Drooping Despite Moist Soil
Wilting in plants usually signals underwatering. In snake plants, wilting alongside moist or wet soil points directly to root rot. The plant wilts because its damaged roots cannot transport water and nutrients to the leaves, even when water is present in the soil.
This is the most confusing symptom for growers because the instinct is to water a wilting plant. Watering a snake plant with root rot makes the situation worse, not better.
Sign 5: Leaves Falling Off at the Base
When you touch yellowed leaves and they detach without resistance, the rot has progressed to the point where the connection between leaf and rhizome has broken down. This is Stage 3 root rot. The leaf base is no longer structurally sound.
Sign 6: Soil Stays Wet for More Than 48 Hours
Healthy fast-draining snake plant soil dries completely within 24 to 48 hours of watering in normal indoor conditions. If your soil stays damp 3, 4, or 5 days after watering, two problems are present: the soil is wrong for snake plants, and the roots are no longer absorbing water at a healthy rate because root rot has reduced their function.
Sign 7: Dark, Mushy, Smelly Roots When Unpotted
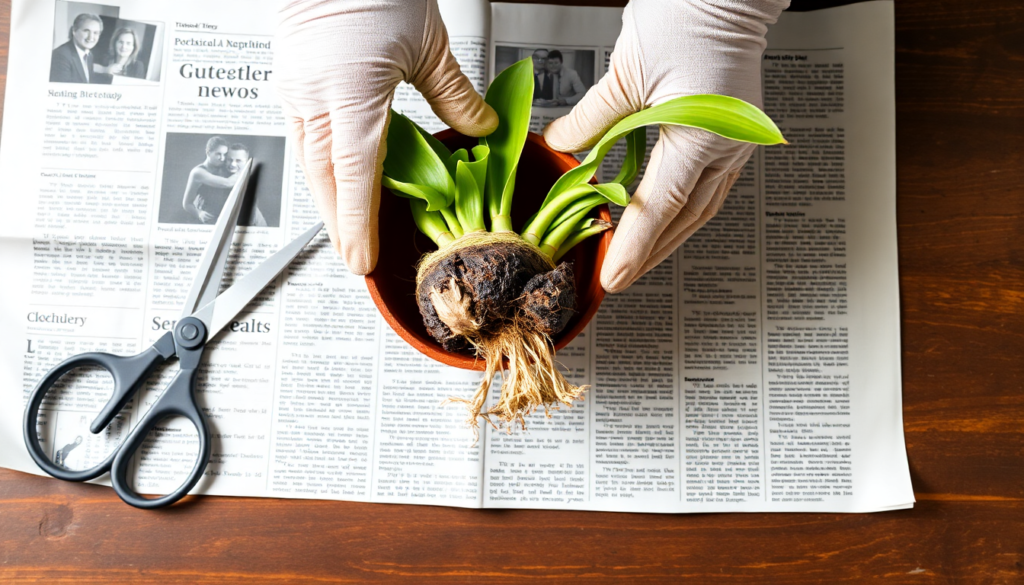
This is the definitive confirmation. Unpot the plant and examine the roots directly. Healthy snake plant roots are firm, white or light tan, and smell clean. Rotten roots are dark brown, black, slimy, soft, and smell foul. They break apart or dissolve when touched.
If more than 50% of the root system shows rot, the plant is in serious condition. If the crown is also soft and black, recovery is not possible.
6 Causes of Snake Plant Root Rot
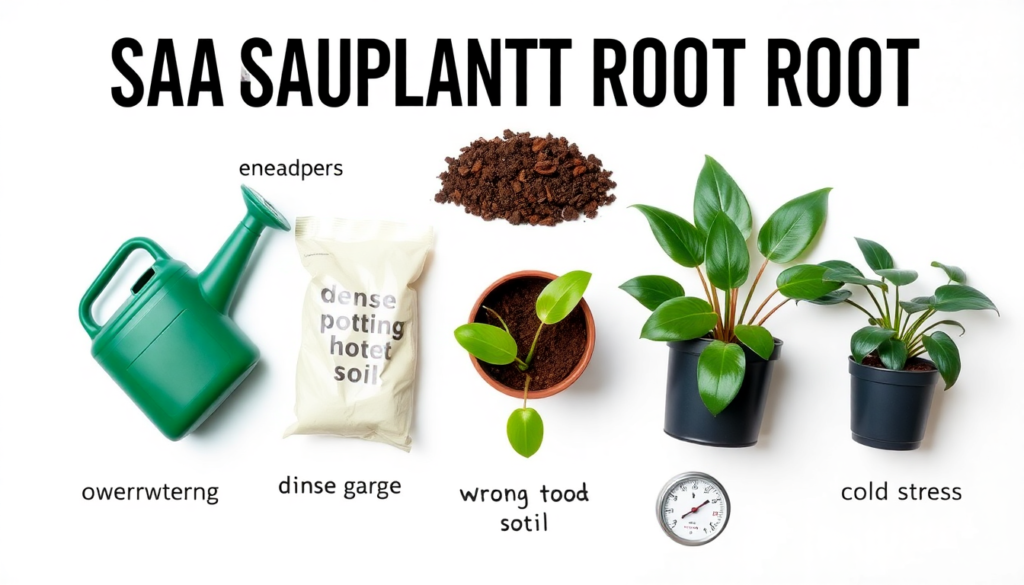
Cause 1: Overwatering
Overwatering is the primary cause of snake plant root rot in 90% of cases. Snake plants are succulents. They store water in their leaves and rhizomes. They do not need frequent watering. Watering on a fixed calendar schedule without checking soil moisture is the most common overwatering mistake.
A snake plant watered every week in most indoor conditions stays in permanently wet soil. That wet soil becomes oxygen-depleted within 24 to 48 hours. Root decay begins shortly after.
How to water correctly: Check the top 2 to 3 inches of soil with your finger before every watering. Water only when completely dry. In spring and summer this means watering every 2 to 4 weeks. In fall and winter, every 4 to 6 weeks or longer.
Cause 2: Poor Soil Drainage
Even correct watering causes snake plant root rot when the soil holds moisture too long. Standard potting mix contains high amounts of peat moss, which retains water for days in indoor conditions. Dense, water-retentive soil keeps roots in a wet anaerobic environment regardless of how infrequently you water.
Snake plants need fast-draining, well-aerated soil that dries completely within 24 to 48 hours of watering. The correct mix: 40% potting mix, 30% perlite, 20% coarse sand, 10% pine bark fines.
Cause 3: Pots Without Drainage Holes
A pot without drainage holes traps all applied water in the soil. No matter how well-draining your soil mix is, water with nowhere to go saturates the root zone. Decorative pots, ceramic bowls, and glass terrariums without drainage holes are frequent culprits.
Always use pots with at least one drainage hole. For pots larger than 10 inches in diameter, two or more drainage holes improve drainage significantly. Never leave a snake plant sitting in a saucer of standing water for more than 2 hours.
Cause 4: Oversized Pot
A pot much larger than the root ball contains excess soil volume. That extra soil holds water the plant’s roots never reach. The wet unreached soil stays saturated far longer than the root zone dries out. Root rot develops in the wet zone outside the root ball and spreads inward toward the roots.
Always repot snake plants into containers only 1 to 2 inches larger in diameter than the current pot. Snake plants tolerate and even prefer slightly snug containers because the smaller soil volume dries faster.
Cause 5: Low Light Conditions
Low light reduces a snake plant’s metabolic rate. The plant photosynthesizes less, grows less, and uses water far more slowly. The same amount of water you apply to a plant in bright indirect light takes 2 to 3 times longer to be absorbed and evaporated in low light. The soil stays wet much longer, creating extended periods of oxygen-poor conditions around the roots.
This is why the combination of a north-facing room and any watering at all leads to chronic overwatering and eventual root rot, even for growers who think they are watering infrequently.
Cause 6: Cold Temperatures
Temperatures below 55 degrees Fahrenheit slow root function significantly. Cold roots absorb water slowly. Combined with slow evaporation in cool air, cold temperatures keep the soil wet far longer than the plant needs. Root rot risk increases substantially when snake plants are placed near cold drafts, on cold floors in winter, or in unheated rooms.
Keep snake plants between 60 and 80 degrees Fahrenheit year-round. Never place them near an exterior door, drafty window, or air conditioning vent.
How to Diagnose Snake Plant Root Rot: Step by Step
Before treating, confirm the diagnosis. Follow these steps in order.
Step 1: Check the soil. Press your finger 2 to 3 inches into the soil. If it feels wet or damp despite not being watered for a week or more, drainage is failing. Smell the soil at the surface. A sour or foul odor confirms active decay below.
Step 2: Check the leaf bases. Squeeze each leaf gently at the soil line. Firm bases are healthy. Soft, squishy, or translucent bases indicate rot has reached the crown or rhizome.
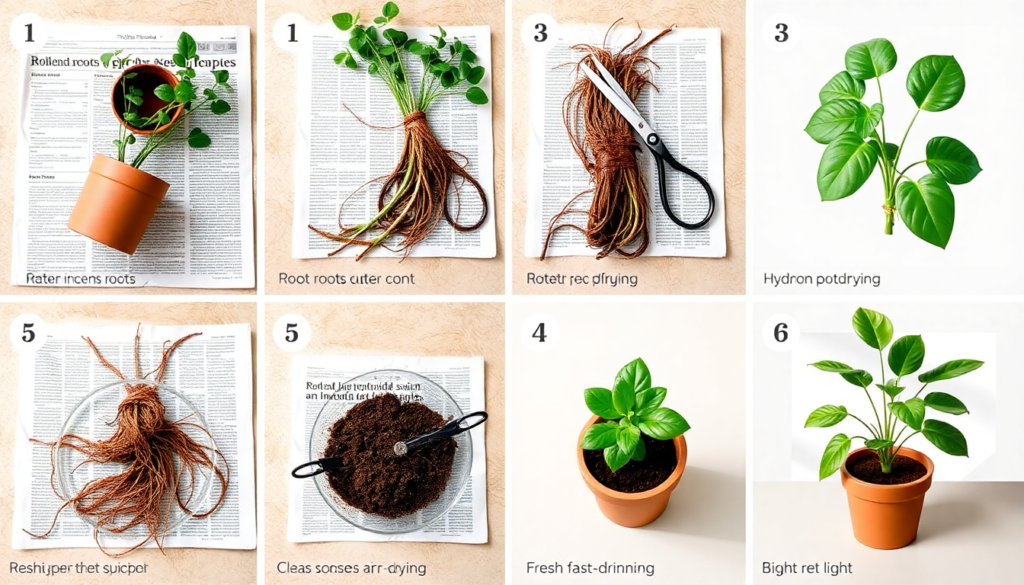
Step 3: Unpot the plant. Tip the pot sideways and slide the plant out gently. Shake or brush off excess soil from the root ball to expose the roots clearly. Do this over newspaper or a tray.
Step 4: Inspect every root. Examine each root section. Healthy roots are firm, white or cream-colored, and intact. Rotten roots are brown, black, slimy, soft, and may smell. Pull gently on suspicious roots. Rotten roots break away with almost no resistance. Healthy roots hold firm.
Step 5: Assess the crown. The crown is the central base from which all leaves emerge. Press the crown with your thumb. A firm crown means the rot is still confined to the roots. A soft, mushy, or black crown means the rot has spread to the plant’s core and saving the plant is unlikely. Move to propagating healthy leaf sections instead.
Step 6: Assess the percentage of root damage. Less than 30% rotten: Good prognosis. Treatment straightforward. 30 to 60% rotten: Moderate prognosis. Act immediately. Careful pruning and good aftercare produce recovery. More than 60% rotten with firm crown: Difficult but possible. Minimal healthy root system must be preserved perfectly. Crown soft or black: Plant cannot be saved. Propagate healthy leaf sections.
How to Save a Snake Plant With Root Rot: Complete Treatment Guide
Work through these steps the same day you confirm root rot. Speed matters.
Step 1: Gather your supplies.
- Clean, sharp scissors or pruning shears.
- 3% hydrogen peroxide solution (standard drugstore variety).
- Fresh fast-draining soil mix (50% cactus mix, 30% perlite, 20% coarse sand).
- A clean pot with drainage holes, 1 to 2 inches larger than the remaining healthy root ball.
- Powdered cinnamon or activated charcoal (optional but beneficial).
- A 10% bleach solution (1 part bleach, 9 parts water) for sterilizing tools.
Step 2: Remove all rotten roots. Sterilize your scissors in the bleach solution. Cut away every rotten root section, cutting 0.5 to 1 inch above where the rot ends into healthy tissue. Do not leave any rotten tissue. Rotten roots spread fungal pathogens to healthy roots if left in contact.
Sterilize scissors again between each cut. This prevents spreading the fungal pathogen from a rotten root to a cut on a healthy root.
Step 3: Rinse the healthy roots. Hold the remaining healthy root system under lukewarm running water to remove all old soil and any loose fungal material. Do not use cold water. Cold water shocks already-stressed roots.
Step 4: Treat with hydrogen peroxide. Soak the healthy roots in a solution of 1 part 3% hydrogen peroxide and 3 parts water for 5 to 10 minutes. Hydrogen peroxide kills remaining fungal and bacterial pathogens on the root surface without harming healthy root tissue. It also releases oxygen into the root cells, which supports recovery.
Step 5: Apply cinnamon or activated charcoal. Dust the cut root ends and any wounds with powdered cinnamon. Cinnamon has natural antifungal properties and helps seal cut surfaces against further infection. Activated charcoal applied to cut surfaces also absorbs toxins and suppresses fungal regrowth.
Step 6: Let roots air dry. Place the plant upright in a dry, shaded spot and let the roots air dry for 12 to 24 hours. This allows the cut surfaces to callous over, which reduces the risk of re-infection when the plant contacts fresh soil.
Step 7: Prepare the new pot and soil. Sterilize the old pot with a 10% bleach solution if you plan to reuse it, or use a brand new clean pot. Fill the bottom third with fresh fast-draining mix. Never reuse the old contaminated soil. Old soil contains the fungal pathogens that caused the rot.
Step 8: Repot and position the plant. Place the plant in the center of the new pot. Fill around the roots with fresh mix. Do not pack the soil. Press gently to eliminate large air pockets without compressing the mix. Position the plant at the same depth it was growing before.
Step 9: Water sparingly and wait. Water lightly, just enough to settle the soil. Do not drench. Wait 7 to 10 days before watering again. The plant’s reduced root system cannot absorb much water. Overwatering immediately after repotting restarts the rot cycle before the plant has a chance to grow new healthy roots.
Step 10: Position in bright indirect light. Place the recovering snake plant within 2 to 4 feet of a bright east-facing window. Bright light supports metabolic activity and encourages new root growth. Do not put it in a dark corner to “reduce stress.” Low light slows recovery.
Do not fertilize during recovery. Fertilizer stimulates top growth that the recovering root system cannot support. Wait at least 2 to 3 months after repotting before introducing any fertilizer.
How to Save a Snake Plant When Root Rot Has Spread to the Crown
When the crown is soft and black, the plant’s growing point is gone. The parent plant cannot recover. But healthy leaf sections from the plant can still produce new plants through propagation.
Leaf cutting propagation from a plant with crown rot:
- Select leaf sections that are still firm, green, and show no yellowing or soft spots. The upper portions of leaves are usually still healthy even when the base has rotted.
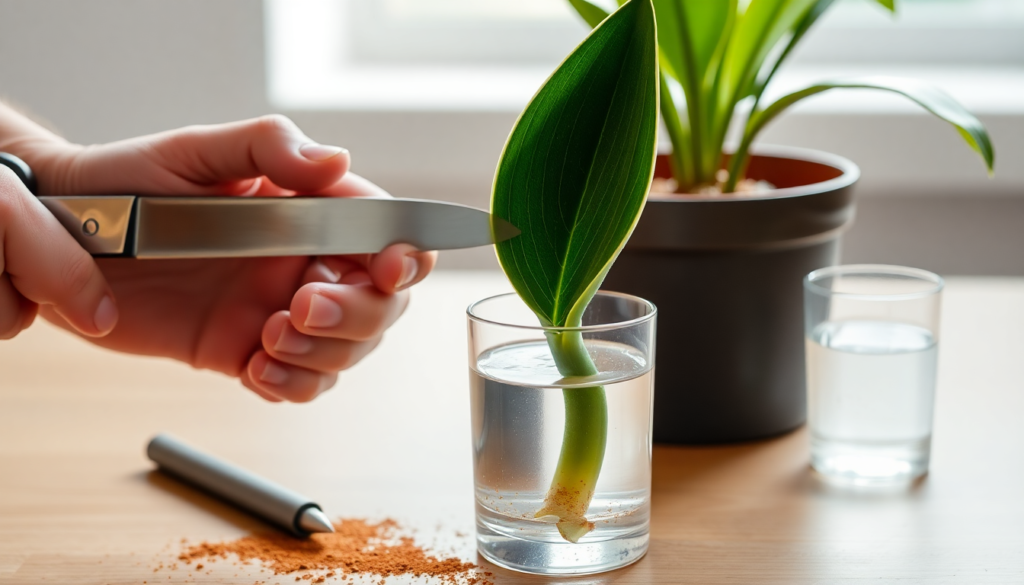
- Cut the healthy sections into 4 to 6 inch pieces using sterilized scissors.
- Mark the bottom of each cutting (the end closest to the soil) with a small notch or mark. Cuttings inserted upside down do not root.
- Let the cuttings air dry for 24 hours to callous the cut ends.
- Place in water or insert base-down into a 50/50 perlite and coarse sand rooting mix.
- Keep in bright indirect light. Maintain barely moist rooting medium.
- Roots develop in 4 to 8 weeks in water, 6 to 10 weeks in soil.
Note: Leaf cuttings from variegated varieties like Laurentii do not preserve the yellow edge variegation. New plants from cuttings revert to solid green. To preserve variegation, propagate by division of pups instead.
How to Prevent Snake Plant Root Rot: 7 Rules
Prevention costs nothing. Treatment costs time, effort, and sometimes the plant. Follow these seven rules and snake plant root rot becomes nearly impossible.
Rule 1: Always check soil moisture before watering. Insert your finger 2 to 3 inches into the soil. If you feel any moisture, wait. A moisture meter gives more accurate readings, especially in dense soil where fingers are less reliable. Target reading of 1 to 2 on a standard moisture meter before watering.
Rule 2: Use fast-draining soil mix. 40% all-purpose potting mix, 30% perlite, 20% coarse sand, 10% pine bark fines. This combination drains completely within 24 to 48 hours. Never use dense garden soil or unammended standard potting mix in snake plant containers.
Rule 3: Use pots with drainage holes. This is non-negotiable. Every snake plant container needs at least one drainage hole. If you use a decorative outer pot, keep the plant in a plastic nursery pot with drainage inside the decorative container. Remove the inner pot to water. Let it drain fully before returning it.
Rule 4: Right-size the pot. Only move up one pot size (1 to 2 inches in diameter) at repotting time. Oversized pots create wet zones outside the root ball that breed root rot before roots grow to fill the space.
Rule 5: Provide adequate light. Bright indirect light keeps the plant’s metabolism active and the soil drying at an appropriate rate. In low light, reduce watering frequency dramatically to compensate for the slower drying rate.
Rule 6: Maintain appropriate temperatures. Keep the plant between 60 and 80 degrees Fahrenheit. Avoid cold drafts, unheated rooms, and cold floors. Cold conditions slow root function and water use, keeping the soil wet much longer than expected.
Rule 7: Repot with fresh soil every 2 to 3 years. Old soil breaks down over time. Organic matter decomposes, perlite settles, and the mix loses its drainage capacity. Fungal pathogens build up in old soil even without active rot. Fresh soil every 2 to 3 years resets the root environment completely.
Snake Plant Root Rot vs. Other Problems: How to Tell the Difference
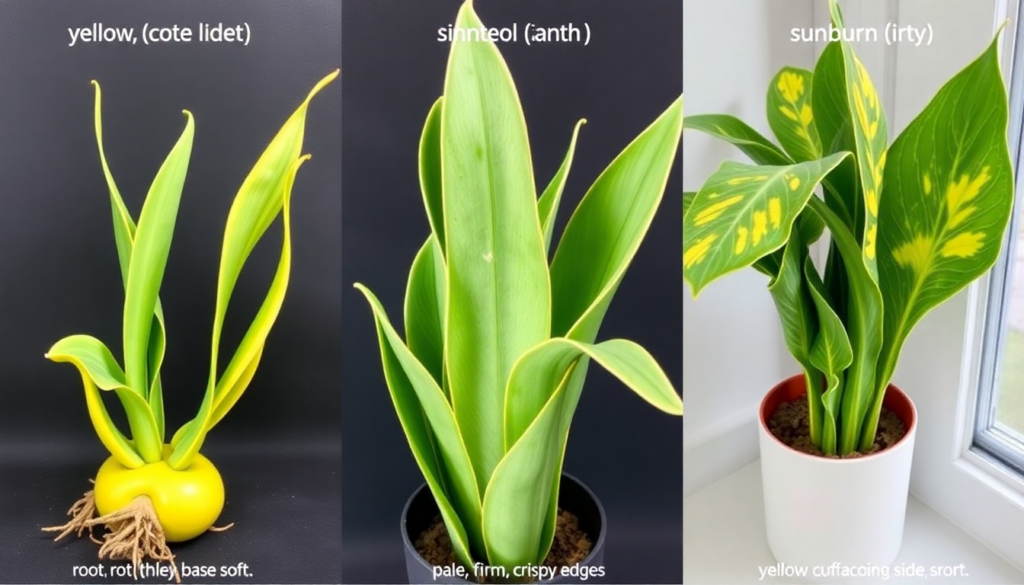
Several snake plant problems look similar to root rot from the outside. Correct diagnosis prevents the wrong treatment.
Root rot vs. underwatering: Both cause yellowing and wilting. Underwatered plants have firm but pale leaves with dry, crispy edges. The soil is bone dry and pulls away from the pot edges. Root rot leaves are soft and mushy. The soil is wet or smells sour. Test: press a leaf base. Soft and mushy = root rot. Firm and dry = underwatering.
Root rot vs. sunburn: Sunburn causes yellow, white, or bleached patches specifically on the side of the plant facing the light source. The affected leaves feel dry and papery, not soft. Root rot yellowing appears across multiple leaves, starts from the base, and the leaves feel soft. Sunburn does not smell. Root rot soil smells sour or foul.
Root rot vs. natural aging: Natural aging yellows one or two of the oldest outer leaves slowly. The leaves feel firm until the very late stages. The rest of the plant looks completely healthy. Root rot yellows multiple leaves simultaneously, starting from the base, and the soil smells off.
Root rot vs. pest damage: Pests cause yellow spots, stippling, or patches in irregular patterns. Leaves feel firm. Look for webbing (spider mites), white cottony deposits (mealybugs), or sticky residue (aphids). Root rot does not create spots. It creates uniform yellowing spreading upward from the base.
Frequently Asked Questions
What does snake plant root rot look like?
The visible signs are yellowing leaves starting at the base, soft and mushy leaf bases when pressed, leaves that detach easily, a foul sour smell from the soil, and soil that stays wet for days after watering. Confirmation comes when you unpot the plant and find dark brown, black, slimy roots that smell bad and fall apart when touched.
How do I fix snake plant root rot?
Unpot the plant immediately. Remove all rotten roots with sterilized scissors, cutting 0.5 to 1 inch above the rot line. Rinse healthy roots under lukewarm water. Soak in a 1:3 hydrogen peroxide and water solution for 5 to 10 minutes. Let roots air dry for 12 to 24 hours. Dust cut ends with cinnamon. Repot in fresh fast-draining soil. Water lightly and wait 7 to 10 days before watering again.
Can a snake plant recover from root rot?
Yes, when caught at Stage 2 or Stage 3. Recovery depends on how much healthy root system remains. Plants with less than 50% root damage and a firm crown recover well with correct treatment. Plants where the crown has turned black and mushy cannot recover, but healthy leaf sections can still be propagated into new plants.
What causes snake plant root rot?
The primary causes are overwatering, poor-draining soil, pots without drainage holes, oversized containers, low light (which slows water use), and cold temperatures (which extend the time soil stays wet). Overwatering and poor drainage together account for the majority of cases.
How long does it take a snake plant to recover from root rot?
After correct treatment and repotting, a snake plant with minimal root damage shows signs of stabilization within 2 to 4 weeks. New root growth begins within 4 to 8 weeks. New leaves emerge 6 to 12 weeks after repotting in good conditions. Full recovery to a healthy, actively growing plant takes one complete growing season.
Should I use fungicide for snake plant root rot?
Hydrogen peroxide treatment during root pruning handles most fungal and bacterial pathogens effectively. A copper-based fungicide applied to the treated roots and new soil provides additional protection in severe cases. Neem oil soil drench helps prevent recurrence after repotting.
How do I know if my snake plant has root rot without unpotting it?
Check for the combination of: wet soil that smells sour, soft mushy leaf bases at the soil line, yellowing starting at the base and spreading up multiple leaves simultaneously, and wilting despite moist soil. Any two or more of these together point strongly to root rot. Unpotting is the only way to confirm it completely.